Coagulation Program Modules
Instructions: ACT Samples
CONTENTS: 2 ACT Specimens (white cap)
2 H2O Diluents (white cap)
2 *CaCl2 (yellow cap)
*DO NOT USE the yellow capped CaCl2 vials, unless using a Hemochron or i-STAT instrument.
1. PROCESS ONE SPECIMEN AT A TIME, including rehydration with the following instructions:
a. Allow vials to reach room temperature. Equilibration may take up to 30 minutes.
b. Be sure to use only H2O Diluent #1 to rehydrate ACT Specimen #1 and only H2O Diluent #2 to
rehydrate ACT Specimen #2.
c. Twist and flip up the caps on an ACT SPECIMEN vial and an ACT DILUENT vial with matching
numbers (use only vials with white caps!).
d. Use a plastic 3cc syringe to transfer 2.00cc of diluent to the specimen.
e. DO NOT AGITATE THE SPECIMEN BEFORE 10 MINUTES. Allow at least 10 minutes for
rehydration. Perform testing within 1 hour after rehydration.
2. Perform the ACT in the same manner as you would test a patient specimen (according to the manufacturer's instructions), with the following exceptions:
HemoTec LRACT method: Before testing, shake the specimen vigorously for 20-30 seconds. The specimen needs to be uniformly dispersed before testing. Add the sample to each cartridge channel in the same manner as you would test a patient specimen, using the same syringe you used for rehydration. Then add 40 uL (~1 drop) of CaCl2 (Medtronic Catalog #550-11 or equivalent) to each channel.
i-STAT system method: Using the same syringe used for rehydration, transfer 0.5cc of ACT CaCl2 to specimen. Before testing, shake the specimen vigorously for 20-30 seconds. The specimen needs to be uniformly dispersed before testing. Draw sample back into same syringe, minimum of 2.5cc, and dispense necessary volume to fill line of i-STAT cartridge. Close cartridge and immediately insert cartridge into i-STAT analyzer.
As per manufacturer recommendations, use the Proficiency Test path. See Technical Bulletin 17-Mar-11
Instructions: XS Specimens
(330 CoaguChek XS Plus Prothrombin Time)
(331 CoaguChek XS Plus Prothrombin Time - Waived 2 Samples)
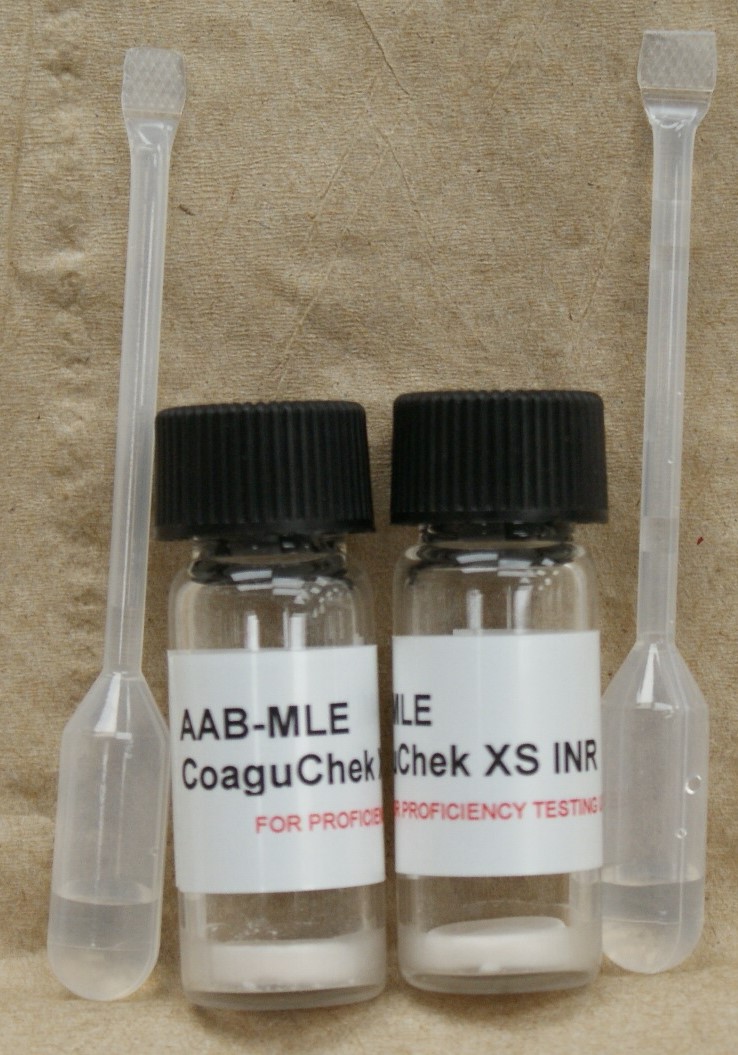
1. Remove the specimen vials and the diluent pipettes from the refrigerator and warm to room temperature (20-25°C). Remove the screw-cap and rubber
stopper from the specimen vial.
2. Shake the contents of the diluent pipette down into the bulb portion with the tip pointing upward. All of the diluent does not have to be evacuated from
the stem portion of the pipette before proceeding. Use scissors to cut off the tip of the diluent pipette.
CAUTION: Hold the diluent pipette vertically by the stem and do not squeeze the bulb to avoid diluent loss.
3. Transfer the entire contents of the pipette into the specimen vial. DO NOT discard the pipette.
4. Replace the cap and gently swirl the vial to dissolve the specimen. DO NOT shake or invert the vial.
5. Allow the specimen to stand undisturbed for at least one minute.
NOTE: You must test the specimens within 30 minutes of reconstitution.
6. Right before testing, gently swirl the vial to mix the specimen. Do not shake or invert the vial. Avoid creating air bubbles.
7. Test the mixed specimen in the same manner as you would a patient sample using the diluent pipette to dispense the specimen.
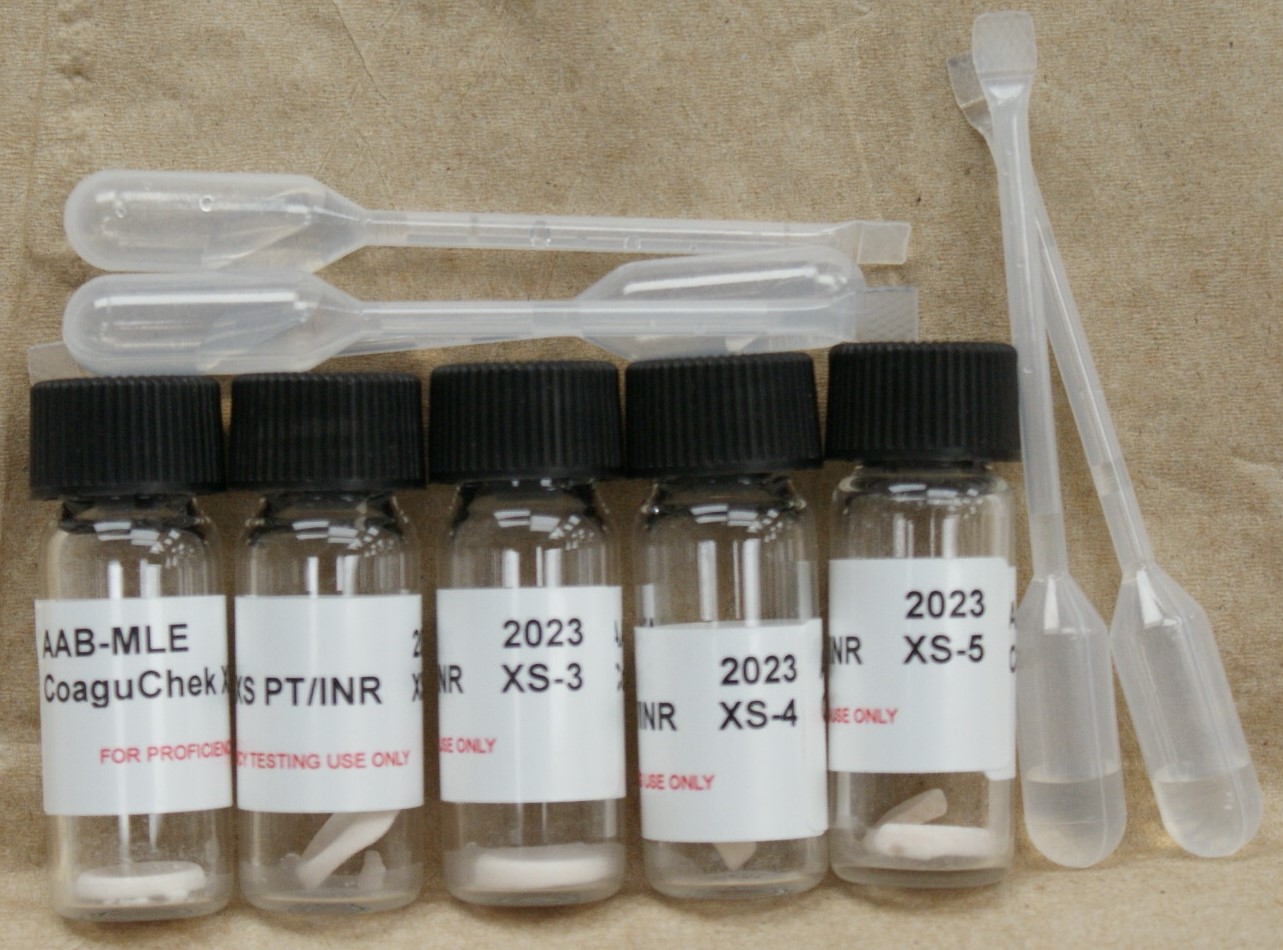
Instructions: XS Specimens
(331 CoaguChek XS Plus Prothrombin Time - Waived)
1. Remove the specimen vials and the diluent pipettes from the refrigerator and warm to room temperature (20-25°C). Remove the screw-cap and rubber
stopper from the specimen vial.
2. Shake the contents of the diluent pipette down into the bulb portion with the tip pointing upward. All of the diluent does not have to be evacuated from
the stem portion of the pipette before proceeding. Use scissors to cut off the tip of the diluent pipette.
CAUTION: Hold the diluent pipette vertically by the stem and do not squeeze the bulb to avoid diluent loss.
3. Transfer the entire contents of the pipette into the specimen vial. DO NOT discard the pipette.
4. Replace the cap and gently swirl the vial to dissolve the specimen. DO NOT shake or invert the vial.
5. Allow the specimen to stand undisturbed for at least one minute.
NOTE: You must test the specimens within 30 minutes of reconstitution.
6. Right before testing, gently swirl the vial to mix the specimen. Do not shake or invert the vial. Avoid creating air bubbles.
7. Test the mixed specimen in the same manner as you would a patient sample using the diluent pipette to dispense the specimen.
Instructions: CG Specimens
1. The specimens are lyophilized samples of citrated human plasma.
2. Use a class A volumetric pipette to add exactly 1.0 mL of distilled water (high purity) to each vial.
Note: You must test the specimens within one hour of reconstitution.
3. Restop each vial. Gently swirl and let stand undisturbed for 15 minutes at room temperature (20-25°C).
• Do not invert vial.
• Avoid vigorous mixing.
4. Before testing the specimen, mix contents by gently swirling. Test in the same manner as you would test a patient sample.

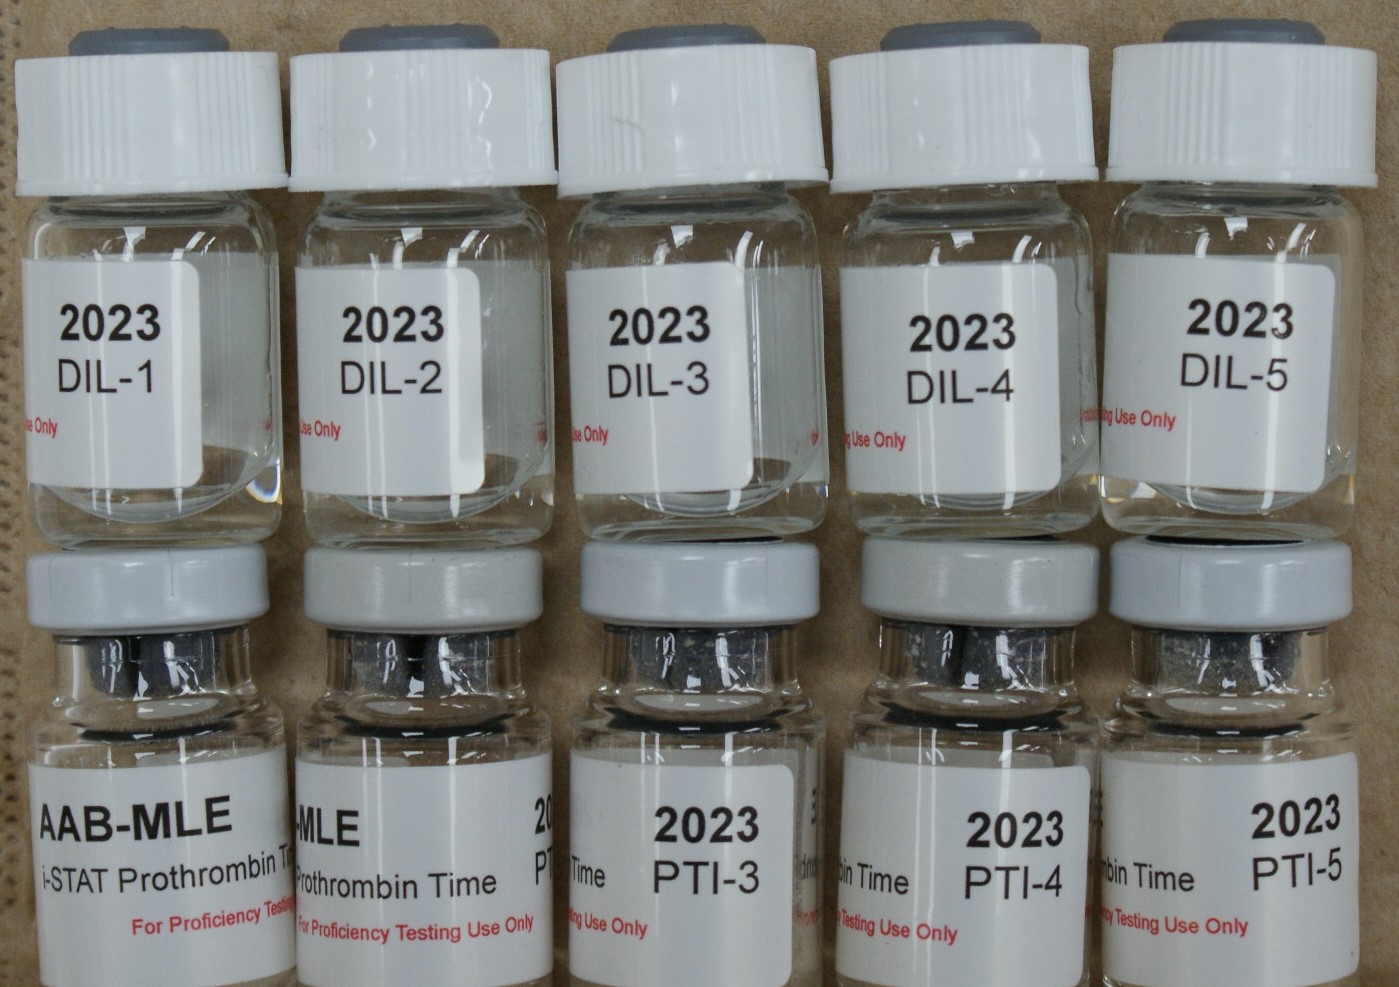
Instructions: PTI Specimens
NOTE: Read all instructions before testing. It is recommended that you process one specimen at a time. Specimens must be used IMMEDIATELY after reconstitution. You will receive 5 vials of lyophilized plasma and 5 vials of calcium chloride diluent.
Instructions: INX Specimens
(324 Roche Coaguchek INR – Waived)
CAUTION: Hold the diluent pipette vertically by the stem and do not squeeze the bulb to avoid diluent loss.
NOTE: You must test the specimens within 30 minutes of reconstitution.